
 My youngest sister is a huge Nintendo fan. She’s always had the gaming systems from handhelds to tv hook ups. One thing that is always a big deal for her is the world of Mario and one of his favorite companions, Yoshi.
In light of all that, for her 30th birthday I wanted to go all out and do a Mario party themed gathering to shock her beyond belief! Needless to say, my little stunt worked. I hammered in on all the decor thanks to a Pinterest blog I followed to get most of my ideas and tips.
I didn’t stop there, even down to the snack foods, I might have gone a teeny bit overboard…but whatever it’s my sister’s big 30 so I had to do the most 😝.
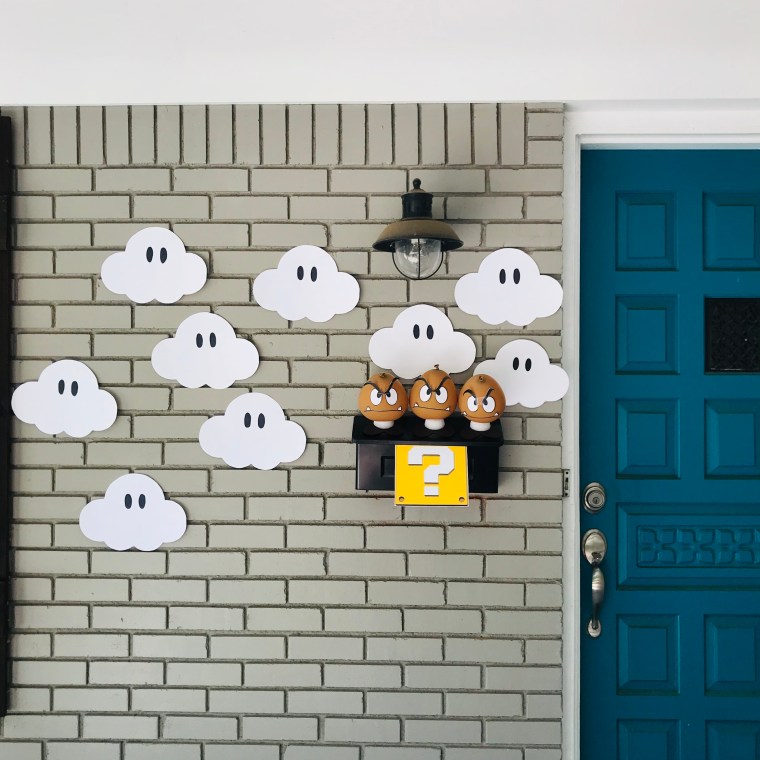
When she walked up to the door, she was instantly met with classic Super Mario clouds, a question block card, and of course Goombas (I didn’t want to make it too easy lol).
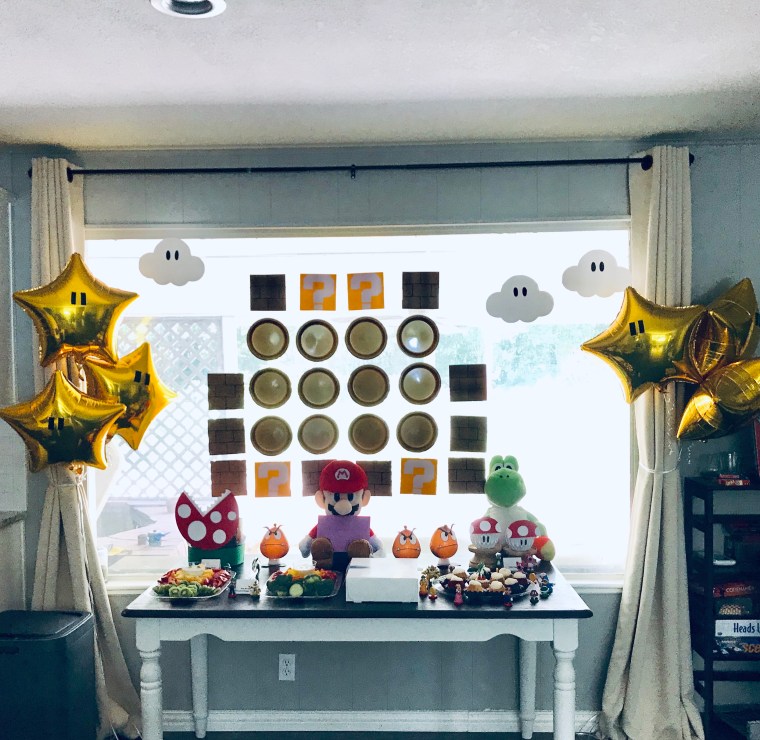
 Once inside, she stepped into the real life world of Mario. I had spent the last few days decorating our huge picture windows with bricks, coins, question blocks, clouds, Goombas, Chain Chomps, gold stars, and pipe vines.


For the snack table I even had food to match the theme thanks to handy dandy Pinterest ideas. We had Piranha Plant Popcorn, Fire Flower Fruit & Veggie Trays, Yoshi Eggs in the 1Up Cups (Jelly Belly’s) and Mario Party Cupcakes.

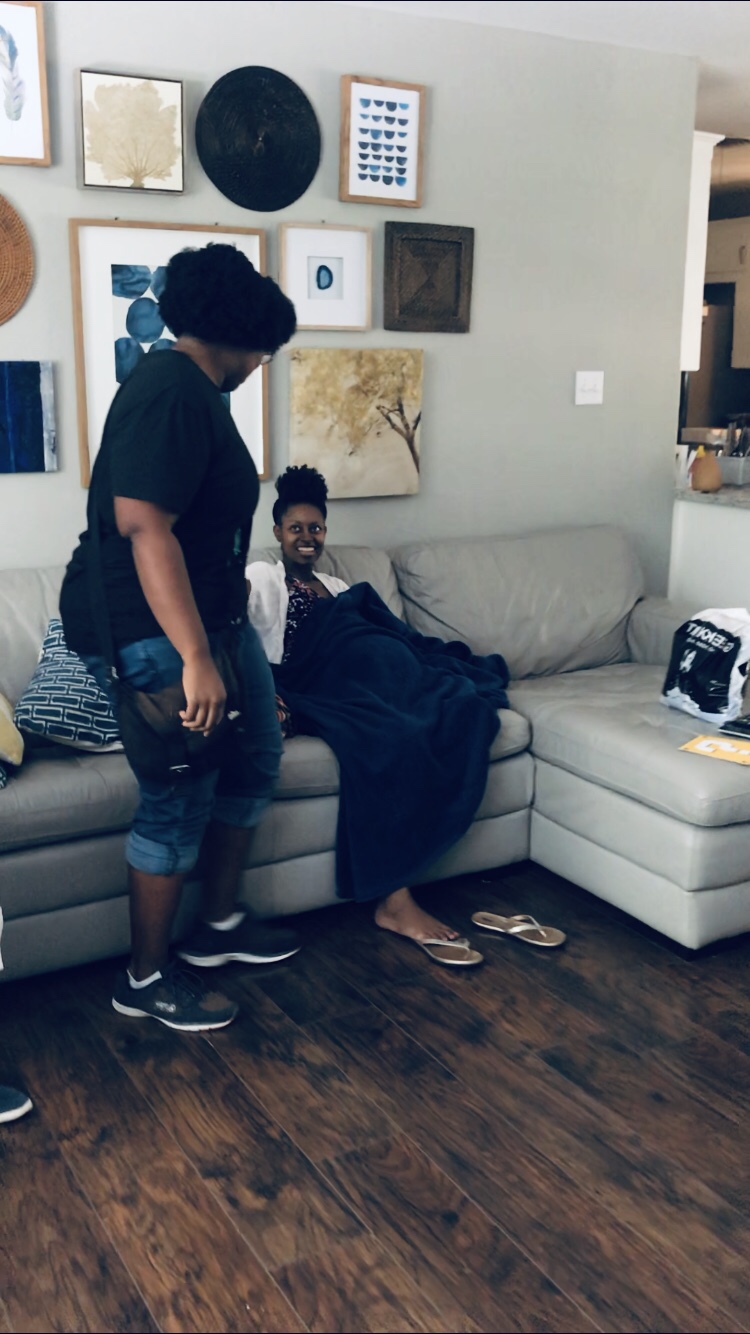
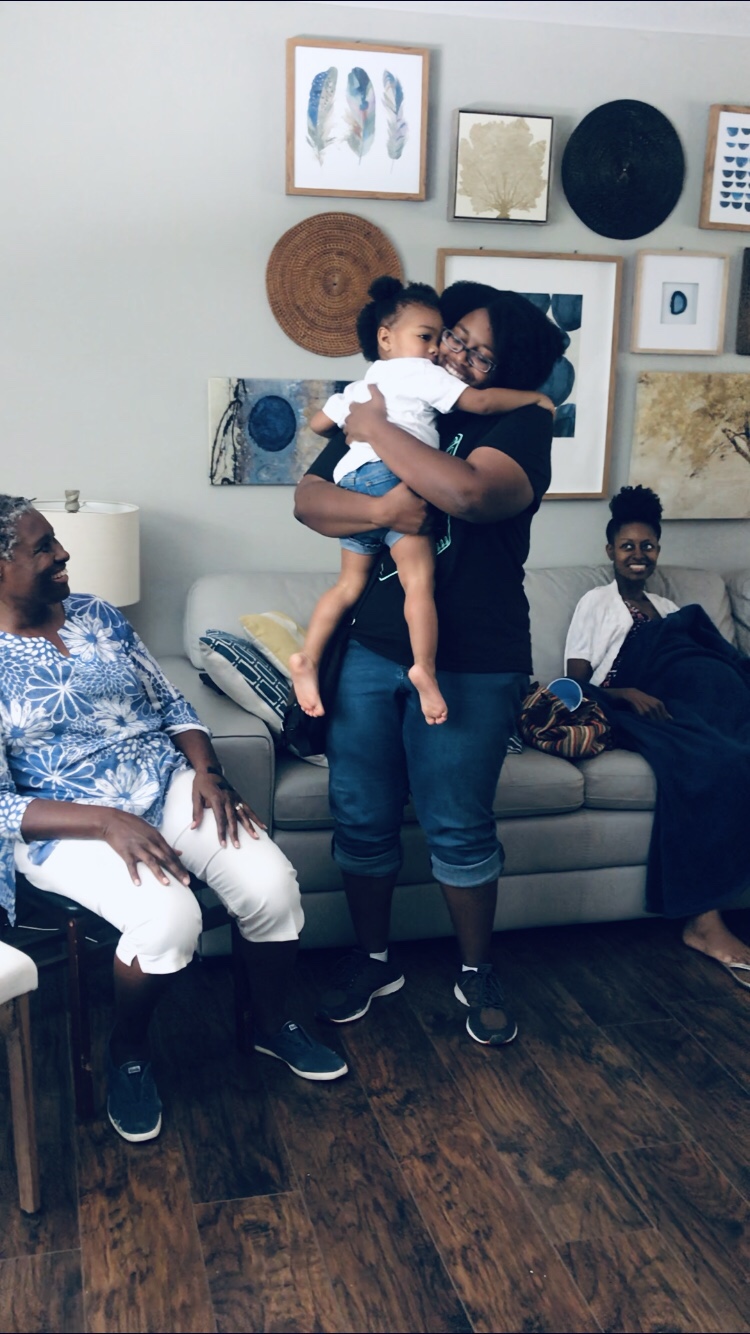
Jessica got right in and got hugs and a welcome to your 30s from everyone.


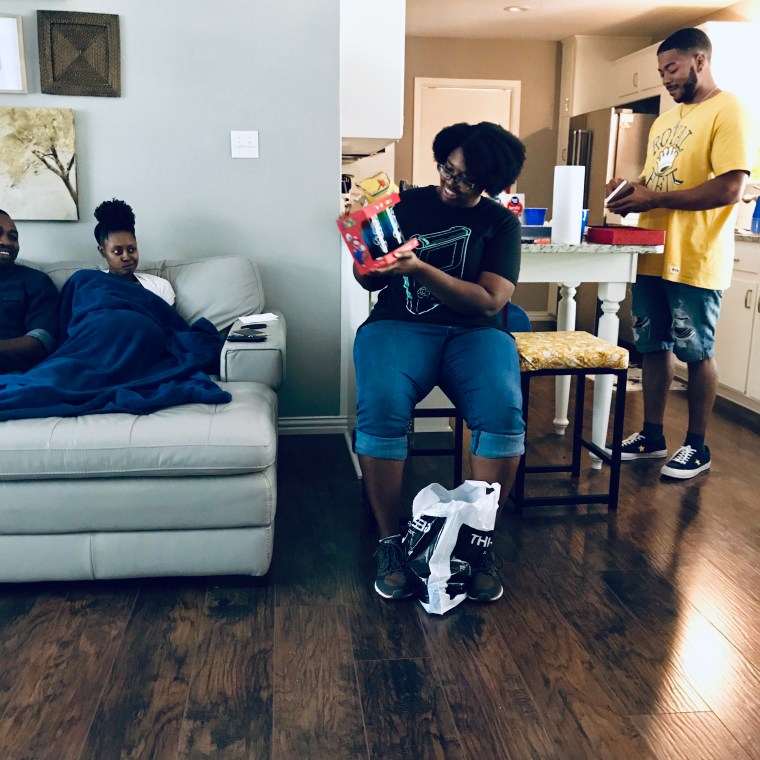
After Nacho bar delights, it was time to open gifts. Of course she got all Mario themed items from ombré drinking glasses, socks to a cool shirt!


 After gifts, it was time for some old school Mario Kart on our multi game super NES Console. I won’t say who won, but it was sure fun 😬😬.
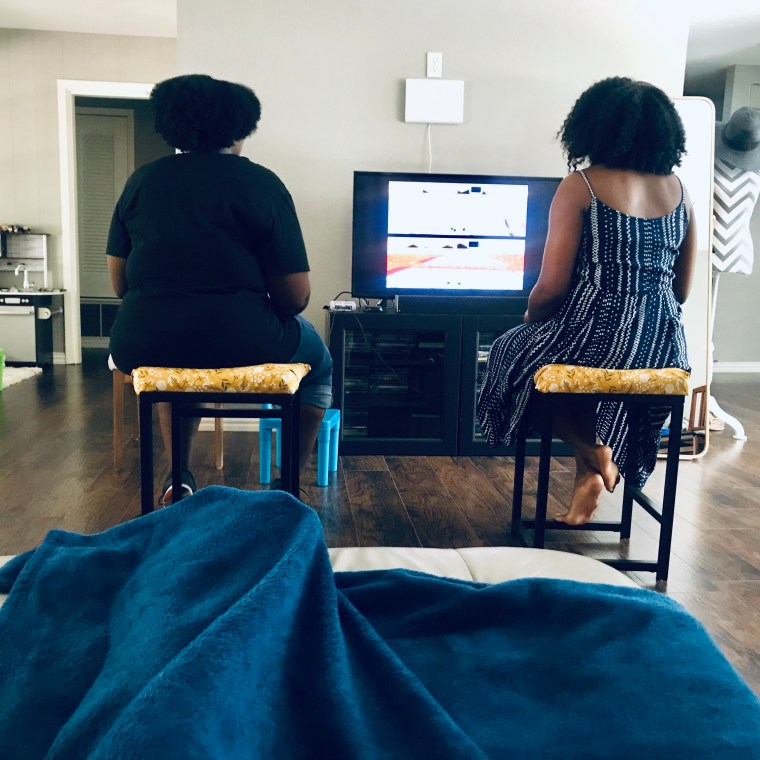
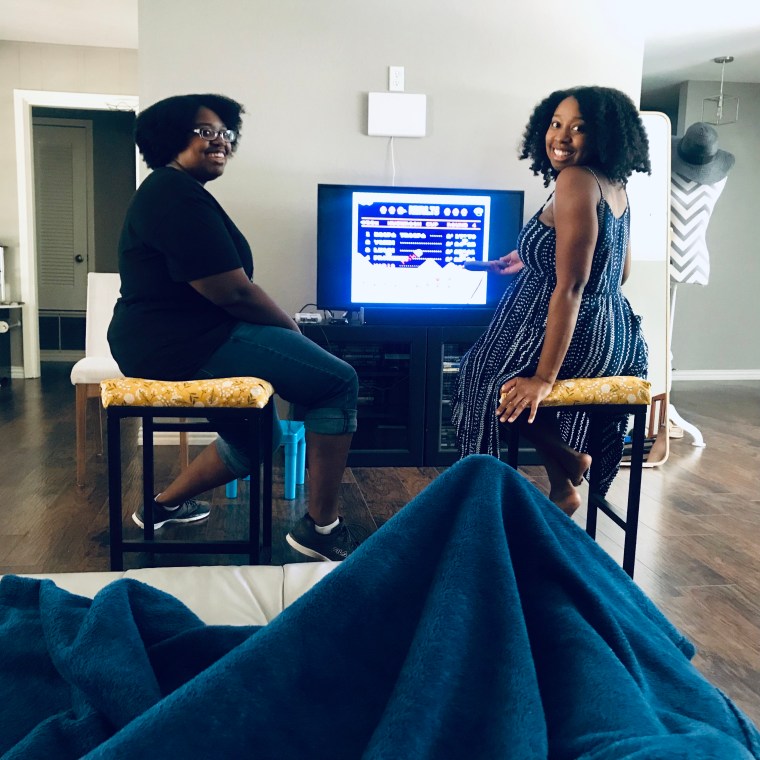 We played some more games and just hung out until the party was over. We are 30+ after all, you didn’t expect us to be up all evening did ya 😂?????!

Overall I’m so happy with how it all came out. I spent a good chunk of 3 days crafting all this and that’s while being on call to a toddler, almost 8 months pregnant, and a 24/7 wifey. I think I did my little sis proud. I know she will never forget this birthday…mostly because every year for the rest of her life I will remind her 😂.
If you would like to know more details on how the decor was made, please see the below. Let’s-a-go!!
Some of the elements I used I found around the house. Mostly I incorporated card stock and some delightful square adhesives from Hobby Lobby to keep my sanity as well as work space mess free.
Goombas:


These little guys were fun! For the head I used 6” mocha colored heart shaped balloons from a shop on Etsy. The eyes and mouth are printed off from a simple google search for “goomba eyes”. The white part was a small styrofoam cone partially cut in half to free stand and the feet are dark brown heart shaped cut outs on card stock.
I used these square adhesives for attaching everything! Huge time saver and they are so much less messy than glue.
1Up Mushroom:

These were super easy. I had some white candle holders on the table so I just cut out half circle red caps and stuck white dots to them. Then I stuck them to the candle holders and also cut out eyes and stuck those as well. I used these as “bowls” to hold the Jelly Belly’s also known as my makeshift Yoshi eggs 😊
Chain Chomp:

These were pretty fun to make. I used black paper lanterns for the head and cut the mouth and eyes with card stock. The red you see on the inside is red tissue paper for something more flexible to use against a sphere base. Then for the chain part I just interlocked double folded crepe paper. These were much simpler to make than I thought. Again, I used my handy sticky adhesives to attach everything.
Pipe Vine: Uuuuugghhh 😩😩 The lady I got this idea from said hers was frustrating to make and unfortunately I had the same experience. Mine isn’t even half the size of what she did so I can only imagine. Sooo much respect for her!
Ok so first off I got mini lime balloons for the leaves. Then for the pipe I used green card stock and wrapped it around an old Quaker oatmeal container. For the vine middle part I used wooden dowels that I wrapped with lime green ribbon (which I really should have painted to save time).
To attach the balloons, I had to tie them super tight to the stick so they wouldn’t droop. Even so, because the stick was so delicate I ended up also using fishing wire to suspend from above so it wouldn’t fall over from it being so delicate. Either way I’m happy how it came out and happy I never have to do it again 😝.
Question Blocks and Bricks:
 I didn’t have time to get cubed boxes so I used my handy dandy scissors and tracing skills to make these flat ones instead. I googled “Mario question mark” to get the layout and then just printed and traced it onto card stock to cut out. Super easy 😊
Piranha Plant Bowl:

 I brought out a large bowl and stood it on a cheesecake container to act as my pipe. I circled the pipe with green paper and then cut a huge circle in red paper and attached teeth and dots. Since people would only see the front I just taped the plant to the front and let that work its magic.
Fluffy Clouds:
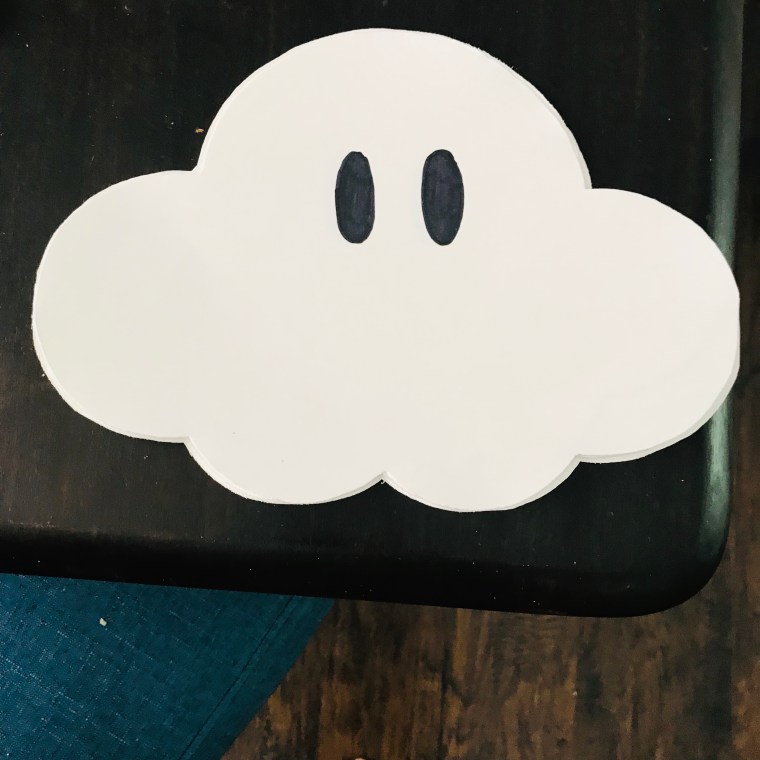
These were so cute and simple. A quick google search for “Mario clouds” yielded me the results I was looking for. I made a page size printout and then traced it onto more card stock and my awesome hubby cut them out. Then to finish I just filled in the eyes with a black sharpie.
Gold Stars:
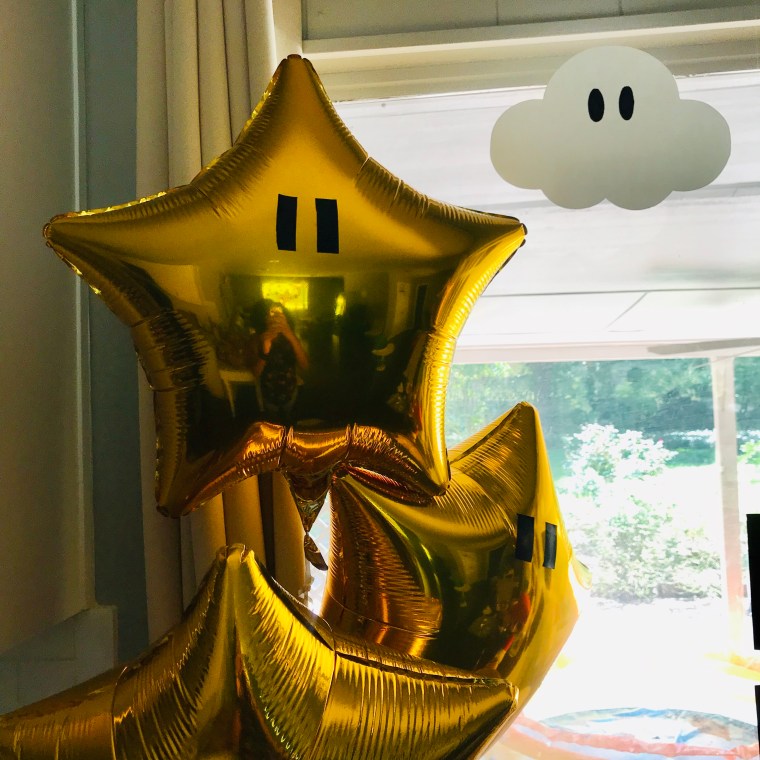
Haha! These were probably the easiest. I bought gold foil stars from Party City and then took some black gorilla tape and cut the eyes and stuck them on. Done!
Fire Flower Fruit and Veggie Trays:
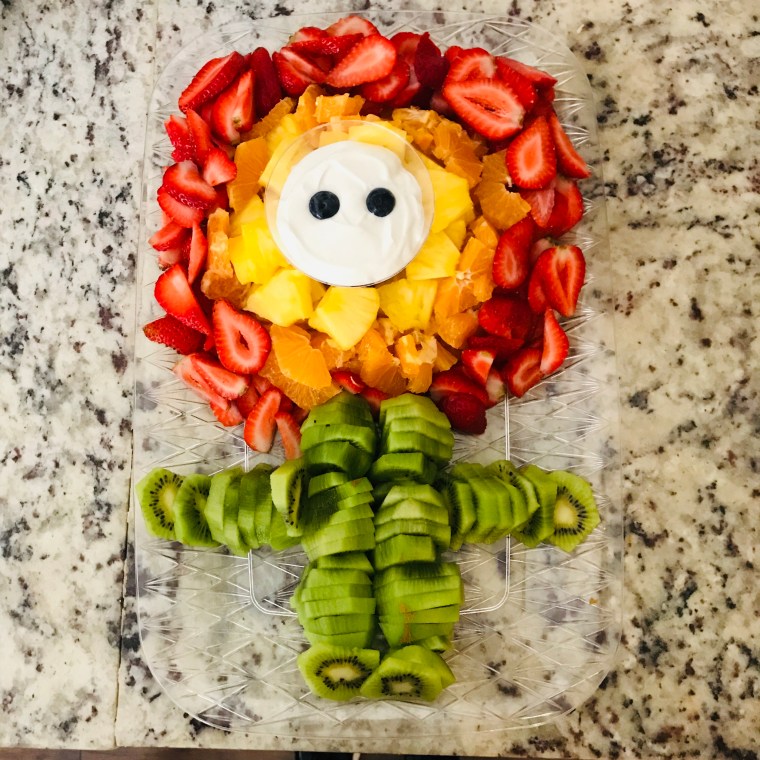
 These turned out soooo cute and yummy 😋 For the fruit I used pineapple, clementines, strawberries, kiwi, and yogurt with two blueberries for eyes.
For the veggies I used yellow bell pepper, baby carrots, cherry tomatoes, cucumber, broccoli florets, and ranch dipping sauce with two cooked black beans for eyes.
Picture Window 1

I was able to purchase some small gold plates to act as coins and with some simple fishing wire, hung them up in our picture windows. I wanted these to face forward so to keep them from spinning I used two pieces of fishing line (one towards the left side of the edge of the plate and one more towards the right side). This balanced it and forced it to hang centered.
The Mario and Yoshi pillows I was able to purchase at my local Target and were doubles as props as well as gifts to my sister.
Picture Window 2
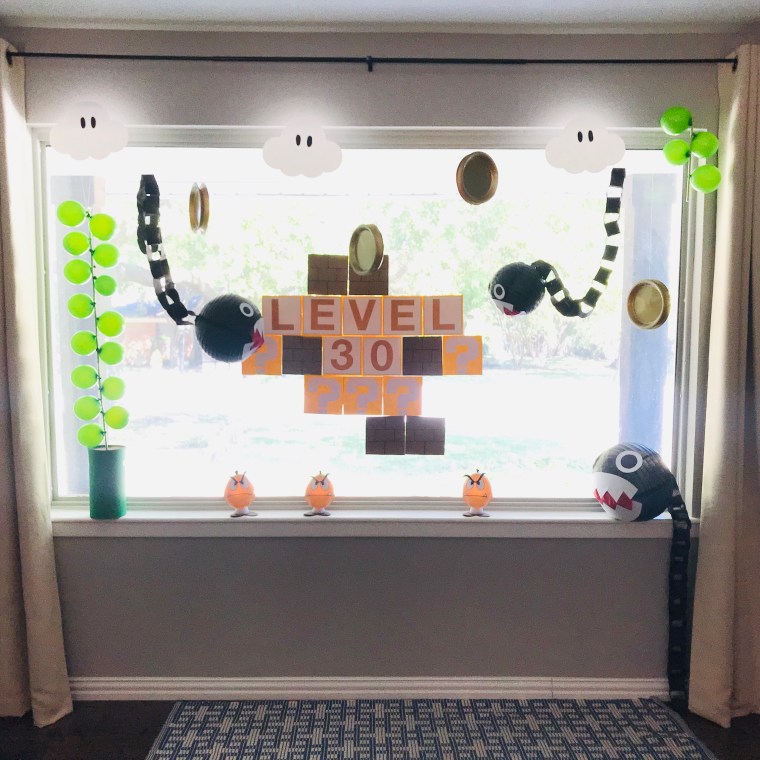
I hung the chain chops with fishing wire from our curtain rod. The letters, bricks, and question blocks I stuck to the windows with my square adhesives since it’s removable. The gold plates I stuck to the backs of each other since I wanted these to spin in the air. And my vines I suspended from the curtain rods as well to keep it secure.
In the end it all came together beautifully. If you have questions about the decor or crafting please feel free to comment below.
